Explore Physical & Mental Benefits of Swimming
March 11, 2024
Pre-Workout Nutrition: What to Eat Before and After Your Workout?
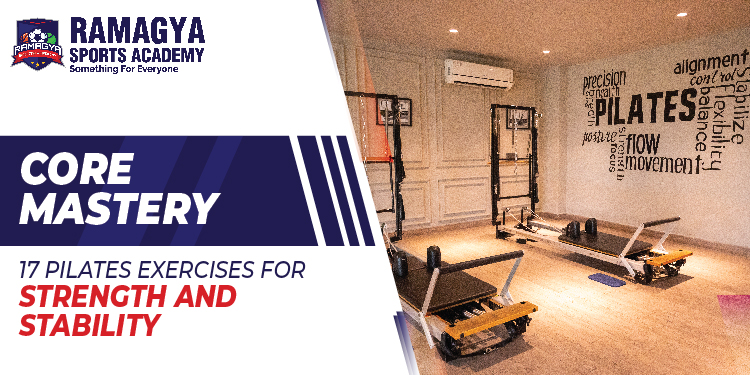
March 15, 202417 Pilates Exercises for Strength and Stability
- The Hundred: To begin “The Hundred,” lie on your back, with your arms stretched out in front of your body and your legs extending towards the ceiling, in the tabletop position. Then, lift your neck and shoulders off of the mat while tightening your core to ensure the stability of your spine. Take a deep breath for 5 seconds and out for five seconds while bringing your arms upwards and downwards carefully. This breathing technique assists in contracting the muscles of the core and increases the flow of oxygen throughout your body. Make an effort to stay in perfect alignment and form throughout the workout, putting quality before quantity. You can see noticeable gains in your general stability, endurance, and core strength by routinely including “The Hundred” into your Pilates routine. This basic exercise acts as a starting point for more complex Pilates exercises and an indicator for your fitness journey advancement.
- Roll-Up: An essential Pilates exercises well recognized for its ability to effectively strengthen and activate those muscles in the back is the rolling up. Lying on your back, with your legs stretched out on the mat and your arms extended in the air, is how you can do an incline roll. Breathe into the warm and then let go when you contract your core to remove your spine and mat. Do this one vertebra at one time. When you’re sitting up high with your arms reaching towards your feet and your spine curving in a C-curve, continue rolling up slowly and carefully. Breathe and remain in the pose for a brief time. Then, breathe out and then roll back up through every vertebra till your back is level on the mat for a second time. The most effective Roll-Up technique is to maintain an even, controlled movement with no jerky movements or speed. Instead of relying solely on the speed of your legs or arms, focus on launching the exercise by focusing on the abdominal muscles. The Roll-Up has many benefits in comparison to simply strengthening the core. These include improved standing, posture awareness, and spine flexibility.
- Single Leg Circle: Starting by lying on your back, with your legs spread on the mat with your arms close to their sides is the ideal starting posture to perform a single Leg Circle. While keeping the other leg securely to the mat, extend one leg towards the ceiling. Then, move your raised leg inwards, downwards towards the opposite side, then return to the beginning position while the core muscle is used to support your pelvis. Throughout the entire exercise, stay in control of your body by keeping it in a stable position and your lower back presses on the mat. While performing during the Single Leg Circle exercise, keep an eye on your breathing and make sure you are synchronizing it with the movement. Breathe in as you turn to move your legs away from the body, and then let it go while you return it towards the middle. Beyond strengthening the core area, Single Leg Circle has many benefits, including improved balance, mobility of the hips and coordination.
- Rolling Like a Ball: To begin Rolling Like a Ball, lie on a mat on the floor with your feet elevated off the floor, knees bent, and arms wrapped around your shins. Start by bringing your navel closer to your spine and utilizing the core muscles. Breathe deeply as you move over your back to the upper part while keeping your feet up and your spine rounded. Use the momentum to roll back into the starting position slowly. The precise fluidity of the movement is the key to mastering Rolling Like a Ball. By using the abdominal muscles, those who practice can effortlessly switch from one motion to the next without relying on strength or external support. It is important to note that rolling like a Ball not only improves core strength but can also provide a great spinal massage, increasing your spinal range of motion and flexibility. The vertebrae softly articulate when you move in a circular motion, alleviating pressure and encouraging circulation throughout your spine. The therapeutic aspect of this exercise helps ease stiffness and pain and is particularly useful for people who live an active lifestyle or are prone to back pain.
- Crisscross: Begin by lying back on your stomach and bending your knees. Place your feet flat on the ground to complete the criss cross position. Lift your shoulders, head and neck off of the mat. Then, pull your chest towards your thighs while using the abdominal muscles. Exhale and move your body left, extend your right leg, and bring your right elbow to that knee on your left. Keep your left leg elevated off the ground with the left leg bent. Breathe deeply as you move back to your centre. Release as you move toward the left, extending your left leg and then bringing your left elbow towards the right knee. Continue to switch sides in an easy, steady movement. The ability to move in a controlled manner and maintain core stability is crucial to learning Criss Cross. The transverse abdominis and the obliques are two deep abdominal muscles that practitioners can use to maintain the pelvis and spine in the turning motion. This workout improves spinal flexibility and posture and strengthens the core.
- Plank: To perform the plank, begin with placing the hands below your shoulders, and then move your body in such a way that your heels and head form an even line. Make sure you don’t have any sagging or arching in your lower back by using the abdominal muscles to stabilize your pelvis and spine. As your strength improves you can gradually increase the amount of time you are on the floor in the position of a plank. Begin with only a few seconds, and gradually work towards longer durations. Through the workout, be aware of the rhythm of your breathing and shift your navel toward your spine to increase the contraction of the core muscle. Maintaining a proper form and alignment as you continue the isometric contraction of core muscles is crucial in achieving the perfect plank. The exercises in planks target not just the core but also the muscles that are located in the upper part of the body, including the shoulders, arms, and chest. This comprehensive exercise program improves strength and stability in the functional area.
- Side Plank: Begin by lying on your back and extending your legs. Then, place them on top of one another in order to complete the side plank. In order to maintain a straight torso from your head to your heels, put your elbow right under your shoulder and lift yourself to your forearm. To lift your hips above the floor and create an even path from head to feet, tighten the core muscles. Bring your upper body to the sky or place it on your hips for assistance. For as long as it is possible, you can hold the side plank. Throughout your workout, keep your neck aligned to your spine. Gaze ahead, and breathe deeply and continuously. Involving the muscles of your core and maintaining the body in a steady, solid posture is essential for perfecting your side plank. Side Plank works the muscles in the legs, arms and shoulders, as well as the core muscles, providing the body with an intense workout. This exercise is beneficial for those who train athletes as well as people who are of any fitness level as it increases overall stability as well as balance and coordination.
- Swimming: Begin by lying face-down on the mat, with the legs in a straight line and arms spread to the sky. Move your chest, legs and head off the mat while maintaining your body straight away from your heels. To keep your spine and pelvis in place, tighten the muscles in your core. Alternately lift and lower your leg and arm in a synchronized motion, imagining swimming in the water. Maintain a fluid and controlled step while paying focus on how your abdominal muscles work to assist the spine and pelvis. Breathe in while you climb and exhale as you lower to ensure that you are aligning your breathing with the movement. The key to mastering the key to swimming is to ensure that you keep your alignment and control under control when you swim. Be sure that your movements are controlled and fluid. Stay clear of any excessive spinal curvature or the drooping of your neck. To maintain your posture, maintain your neck in alignment with your spine and lean a little towards the front.
- Teaser: Lying on your back with your arms stretched out in the air while your legs are straight towards the front is the way to do a Teaser. Bring your lower back onto the mat using the core muscle to support your spine and pelvis. In order to get yourself ready for your practice, take a deep breath. As you let go of the breath, lift your legs, arms and your chest off the mat simultaneously while reaching your toes. When you’re balancing on your seated bones, make sure you keep your body in the “V” shape by maintaining an encapsulated connection between your limbs and the core. For a short time, you can maintain this posture by ensuring that the abdominal muscles are tense and your spine is fully extended. Breathe deeply as you slowly return to your original position. The ability to be able to move in a controlled manner and engage your core muscles with precision is vital for learning to master Teaser. During your workout be aware of the breath and pull your navel toward your spine to work your abdominal muscles more completely. Make sure to keep your movements steady and fluid movements. Don’t make any abrupt or jerky movements.
- Saw: Begin your Saw posture by sitting straight on the mat with your arms at shoulder height and your legs spread apart. Make sure that you are in a high and erect posture, making use of the core muscles of your body to support your pelvis and spine. For a good start to the exercise, take a long breath. When you are ready, let it move your head to the left and then extend your left hand to your right foot. Keep the bones of both your feet onto the mat. Keep your back straight and stretch your hips outward while you move your right hand towards the left side of your foot. As you turn and reach, feel the tension on both sides of your upper body. Inhale to manage your descent back to the centre. Then relax as you move to the left. Perform the sawing movement to the opposite side. Engaging these muscles during turning can strengthen the spine, promote better posture, and align the spine. The ability to control your movements and precisely activate the abdominal muscles is vital in mastering Saw. Try to move effortlessly and smoothly without causing any strain on your neck or shoulders.
- Corkscrew: Begin by lying back on your back, with your legs straight toward the sky and your arms stretched out to your sides in order to perform the corkscrew. For a good start to the exercise, take a deep breath. As you let go of your hips, lift them off the mat with your abdominal muscles[1]. This will create the smallest “C” curve with your spine. Lower each leg to one side while in a controlled turning motion, making sure your core stays steady and attempting to get it as close as you can without touching it. Throughout the entire exercise, make sure to keep your shoulders planted on the floor and keep your balance. The corkscrew can injure the hip and back muscles and the deep abdominal muscles, including the transverse abdominis and the Obliques. During your exercise, pay attention to your breathing. Also, keep your navel in the direction of your spine to activate the abdominal muscles more deeply. Make sure to move smoothly and fluidly without causing any strain on your neck or shoulders.
- Leg Pull Front: Begin in a push-up posture by placing your hands directly beneath your shoulders. Place your body aligned from your head to your feet to perform a Leg Pull Forward. Take a deep breath to get ready for release. As you let go of your legs, you can lift one leg off the mat and extend it in front of you to keep your core strong. While lifting, keep your hips straight and your spine from twisting or sliding. For a few minutes in the pose, keep it at its highest level while noting how your hamstrings, glutes, and abdominal muscles are engaged. Be sure to control your movements and slowly lower the leg back on the mat, breathing while you do it throughout the entire workout, focus on keeping your core in place, and avoid the spine from arching or rounding. Leg Pull Front strengthens the muscle groups of arms, shoulders, and legs, along with the deep abdominal muscles, like the transverse abdominis and obliques. It is vital to learn to work the core muscles with precision and control. During your workout, be aware of the rhythm of your breathing and pull your navel toward your spine to work the abdominal muscles more completely. Make sure to move smoothly and fluidly and avoid any strain or tension in your neck or shoulders.
- Jackknife: Lying back on your stomach by extending your arms and legs over the top is the ideal starting point for the Jackknife. Inhale deeply to relax, and as you let go of the air, lift your legs and upper body off the mat and raise your arms to the ceiling. While lifting, ensure that your limbs and core are in a tight alignment to create a “V” with your body. While lifting make sure you keep your toes straight as well as your legs straight and maintain your weight in check. In control, return slowly to your starting position, taking a deep breath throughout the process. A jackknife is a tool for the quadriceps, hip flexors, lower back muscles, and abdominal muscles like the obliques and transverse abdominis. The ability to control your movements and work the core muscles precisely is crucial to mastering the art of jackknifing. Make sure to move effortlessly and smoothly and avoid any strain or stress on your neck or shoulders.
- Double Leg Stretch: Lying on your back, with your knees bent in front of your chest with your arms extending along you, is the very first step in completing the stretch of your legs twice as you keep your back in neutral posture as you contract your abdominal muscles to force your lower back on the mat. Inhale deeply to warm up. Then, as you let go of the air, lift your arms over your head, and then straighten your legs until you are at a 45-degree angle to the mat. When you exhale, bring your arms back to your body, pull your knees into your chest and maintain the connection between your limbs and your core. Simultaneously, return your knees towards your chest and then return to the original position. Practitioners can activate the muscles in the legs and arms, as well as the deep abdominal muscles like the transverse abdominis and the obliques, by focusing on controlled breathing and precise movements. A double-leg stretch increases the flexibility of the spine and improves mobility while also strengthening the core. The spine lengthens as the muscles extend towards the body, which allows the vertebrae to break apart and encourages the proper alignment of the spine.
- Side Leg Series: Lying on your side, with your hips and shoulders stacked. Keep your body straight from your head to your feet. To increase stability, put your upper hand on the mat to your left and place your head on the lower arm. This Side Leg Lift is the first exercise in the sequence. Straighten your upper leg upwards towards the ceiling with a solid chest and hips that are stacked. Slowly lower the leg to ensure that it doesn’t get into contact with the mat or another leg. Perform many repetitions of this movement and pay attention to how your hip and thigh muscles contract. Lift the upper leg to just above the hip and then use the leg to make a small circle in the air. Try to make precise, controlled movements that help keep your core and pelvis stable. In order to evenly engage your muscles from both sides, turn the direction once you’ve completed a few rounds in the direction you started. This Inner Thigh Lift is the final exercise in the Side Leg Series. Start on the mat and place the upper leg behind the leg below. By using the muscles of the inner thigh, lift the lower leg towards the ceiling. Then, slowly lower the leg down while keeping the core’s stability.
- Seal: The first step to doing the Seal by using a secure grip and holding the ankles using your hands. To extend your neck through the top of your head and to support your spine. Tighten the abdominal muscles. In order to get ready to begin, please take a deep breath, then let go of it by bending the spine in a C, raising your legs off of the mat, and putting your body on your tailbone. While your feet are slightly elevated off the floor, Your knees should be separated. While your spine is in a rounded position, begin clapping your feet three times fast and control the motion with your core muscles. In order to increase the strength of your abdominal muscles and increase the intensity of your abdominal muscles, pull your navel towards your spine while you steadily exhale and make your feet clap. Inhale deeply following the third clap. Roll backwards in order to return to the starting position. Be sure that your movements are fluid and controlled. Seal strengthens the pelvic floor muscles, along with the deep abdominal muscles, including the transverse abdominis as well as the Obliques. In addition, Seal encourages the body to move healthily and avoids stiffness and discomfort.
- Balance Control Front: Begin by lying downwards on your mat, with your legs bent and with your arms spread overhead in order to perform Balance Control Front. To stretch your spine and strengthen your pelvis, tighten the abdominal muscles. In order to get ready for the exercise, take a deep breath. When you are ready, let it lift your arms, legs and chest off the mat until you’re floating a bit off the mat. To ensure that your neck stays in alignment with the spine, maintain the body in a line from toe to head and turn your head slightly to the side. For a few seconds, keep this posture in place as you breathe slowly. After that, slowly lower yourself while taking a breath. The transverse abdominis, as well as the obliques, are two abdominal muscles deep, which can be used to help support your spine and pelvis and to avoid excessive arching and drooping. Alongside strengthening the core muscles, the Balance Control Front enhances body awareness in general since it is difficult to remain upright in this posture and requires focus and concentration that strengthen the connection between the mind and body; breathing and exercise help enhance respiratory health and oxygenation of the muscles, which improves endurance.
Conclusion:
Incorporating Pilates exercises into your exercise program will help you become more stable and stronger. By focusing on the primary muscles of the body, these exercises help improve posture, balance, and overall body strength. Pilates offers a variety of exercises designed to strengthen and strengthen the core muscles exercises, from classic ones such as Roll-Up or The Hundred to more difficult ones like Teaser or Control Balance. Pilates exercises also improve the strength of your functional muscles, making it simpler and more effective for people to complete routine tasks. If you’re new or an experienced instructor, Regular Pilates exercises can help you build stronger core muscles, greater stability, and an overall healthier physical state. The 17 Pilates exercises will aid in building an incredibly stable, strong core, improved posture and overall control and strength of your body, each of which contributes to a more strong, flexible body.Read our Article: How Swimming Effects on Body?


